Quick Start Guide
Once the add-on is installed and enabled a new «Editor Type» will become available (the drop down list in the top left title bar of every area) called «Bake Node Editor»:
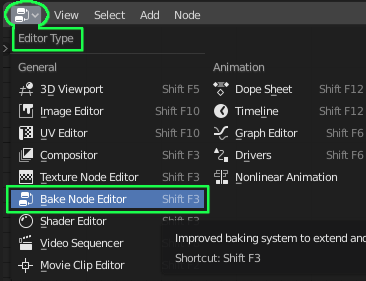
Switch to the Bake Node Editor and click «New» to create a recipe. Your recipe will start with the most simple bake node configuration loaded. This guide will cover this simple configuration, for details on each node take a look at the Nodes Section and for more complicated set ups hop on over to the Examples.
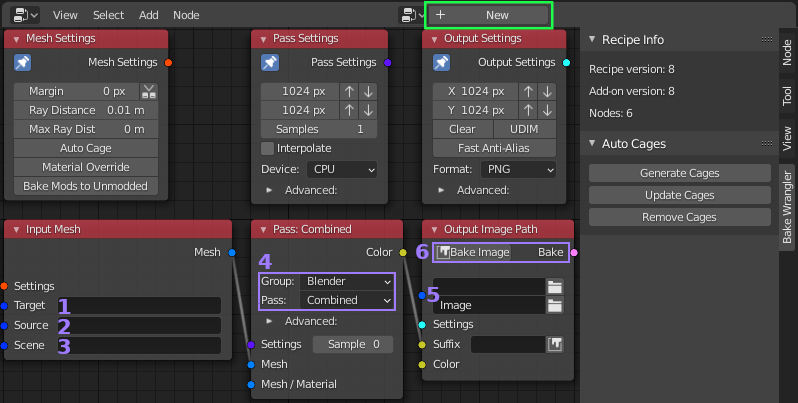
There are three primary node types: Inputs, Passes and Outputs. Each of these node types has a «Settings» socket and an associated node with settings for that part of the process. The Pin in the top left of a settings node causes it to be applied to all nodes with an empty «Settings» socket of that type.
Note that the side («N») panel also has additional information and buttons. If your recipe was of an older version, an «Update» button would also appear here. Some nodes not shown here also display information in the side panel.
- Target: is the object you want to bake to. It must be a «MESH» type object
with a UV Map. A list of objects can also be connected here which would cause each
object in the list to be baked with the same settings. This field must be filled.
- Source: is the object you want to bake from. The field is optional and if
left empty the data will be taken from the target object. Most renderable objects can
be used as the target and a list of objects can be connected. If multiple objects are
selected then all of them will be applied to each target (if there are multiple
targets).
- Scene: is used for including light emitters and shadow casters. It is important to note
that some passes will not produce any output if lighting is not included. This is true of
the standard blender passes Combined, Diffuse, Glossy, etc. Lighting could also be included
by the «World» material which can be set under the advanced options in the «Pass Settings».
- Group & Pass: selects the type of data you want to bake. Some passes will display additional
options below them when selected. In the example picture the «Albedo» pass in the «PBR» group
has no additional options.
- Image Path & Name: selects where the baked image will be saved. Relative locations are
supported and will be expanded on bake (Eg. Using // for the current path). File extensions
are added automatically to the name. There are more advanced options for splitting and naming
the outputs not covered here.
- Bake Image Button: will first validate the settings and then begin a background process to create the image. In the bottom right corner of Blenders status bar a «BW» icon shows the current state: Green when the last operation completed successfuly, Blue when a background process is running and Red when the last process had an error. You can click on this icon to bring up a log which will update in real time. There are also preferences to control the log and have it automatically display when you start a bake.
Most of the other settings a fairly self explanatory and can often be left at their defaults. More node types and details of each setting are covered in the Nodes Section